


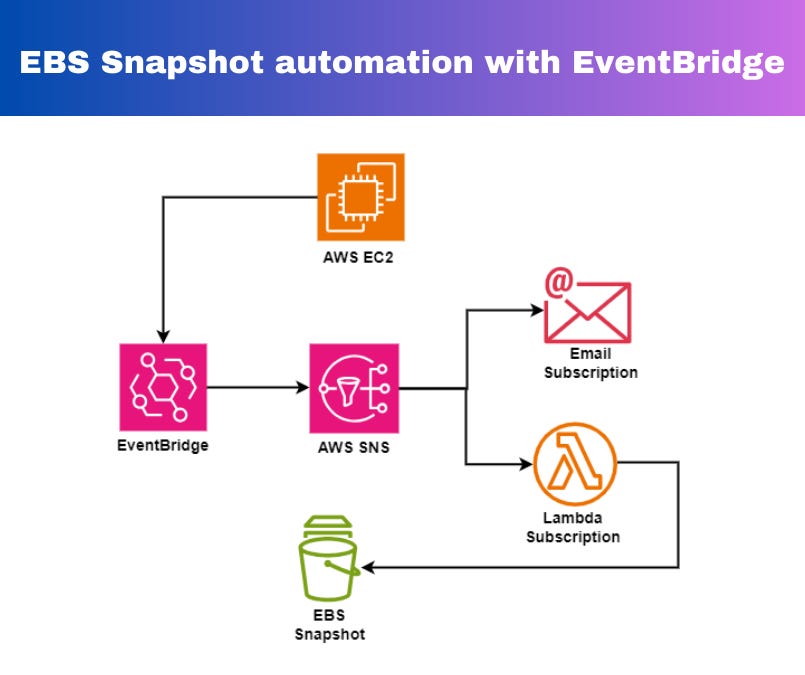
EBS Snapshot automation using EventBridge

Have you ever felt that sinking feeling when disaster strikes your EC2 instance?
Data loss can be a nightmare, especially for growing cloud enthusiasts like yourself. But fear not! Here's a superhero to the rescue: automated EBS snapshots with EventBridge.
Imagine this: You can ditch the manual backups and free up your valuable time for bigger projects. EventBridge takes care of creating snapshots automatically, so your data is always safe and sound, even if your instance experiences a hiccup.
Launching the EC2 server
Now Let's start by launching the EC2 server, Have the Following Specifications:-
Name: testServer
AMI: Amazon Linux 2
Instance Type: t2.micro
Key Pair: Processed without key pair
Auto Assign public IP: Enable
Security Group: Allow SSH from Anywhere
After you launch the EC2 server, Copy the instance ID as we need it later.
IAM role for Lambda Function
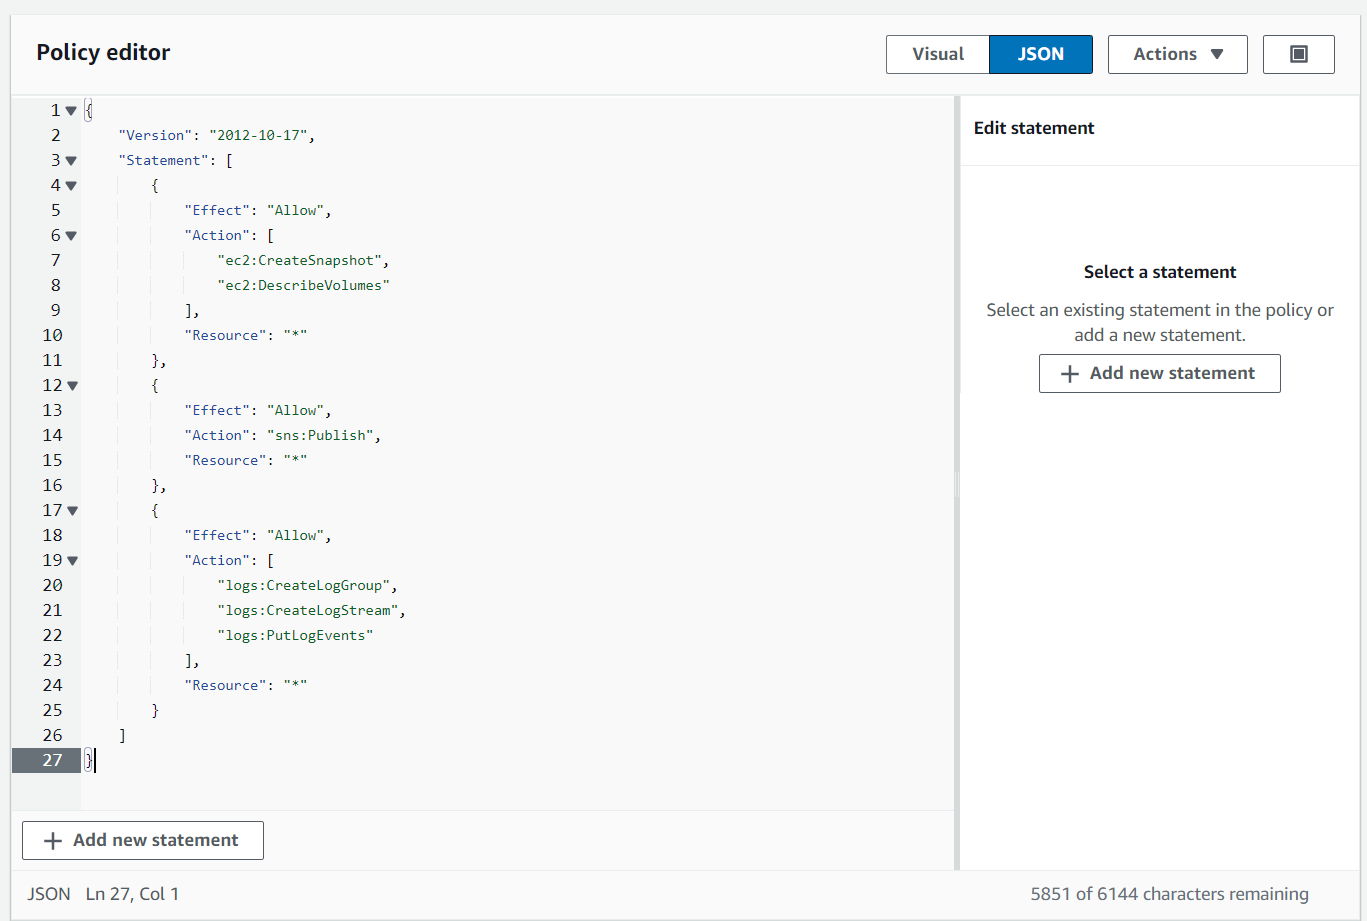
Now Go to IAM and create a policy named, "snapshot_policy" with the following JSON code
{
 "Version": "2012-10-17",
 "Statement": [
 {
 "Effect": "Allow",
 "Action": [
 "ec2:CreateSnapshot",
 "ec2:DescribeVolumes"
 ],
 "Resource": "*"
 },
 {
 "Effect": "Allow",
 "Action": "sns:Publish",
 "Resource": "*"
 },
 {
 "Effect": "Allow",
 "Action": [
 "logs:CreateLogGroup",
 "logs:CreateLogStream",
 "logs:PutLogEvents"
 ],
 "Resource": "*"
 }
 ]
}
It is time to create a role that we can attach to Lambda to provide it with the permissions to create EBS snapshots. So go to Roles then on Create role. For the Trusted entity type select AWS service and for the Use case select Lambda.

Then Click Next. In the Add permissions screen search for the policy we just created. Select it and click Next. In the next screen, type in snapshot_role for the name then click on Create role.
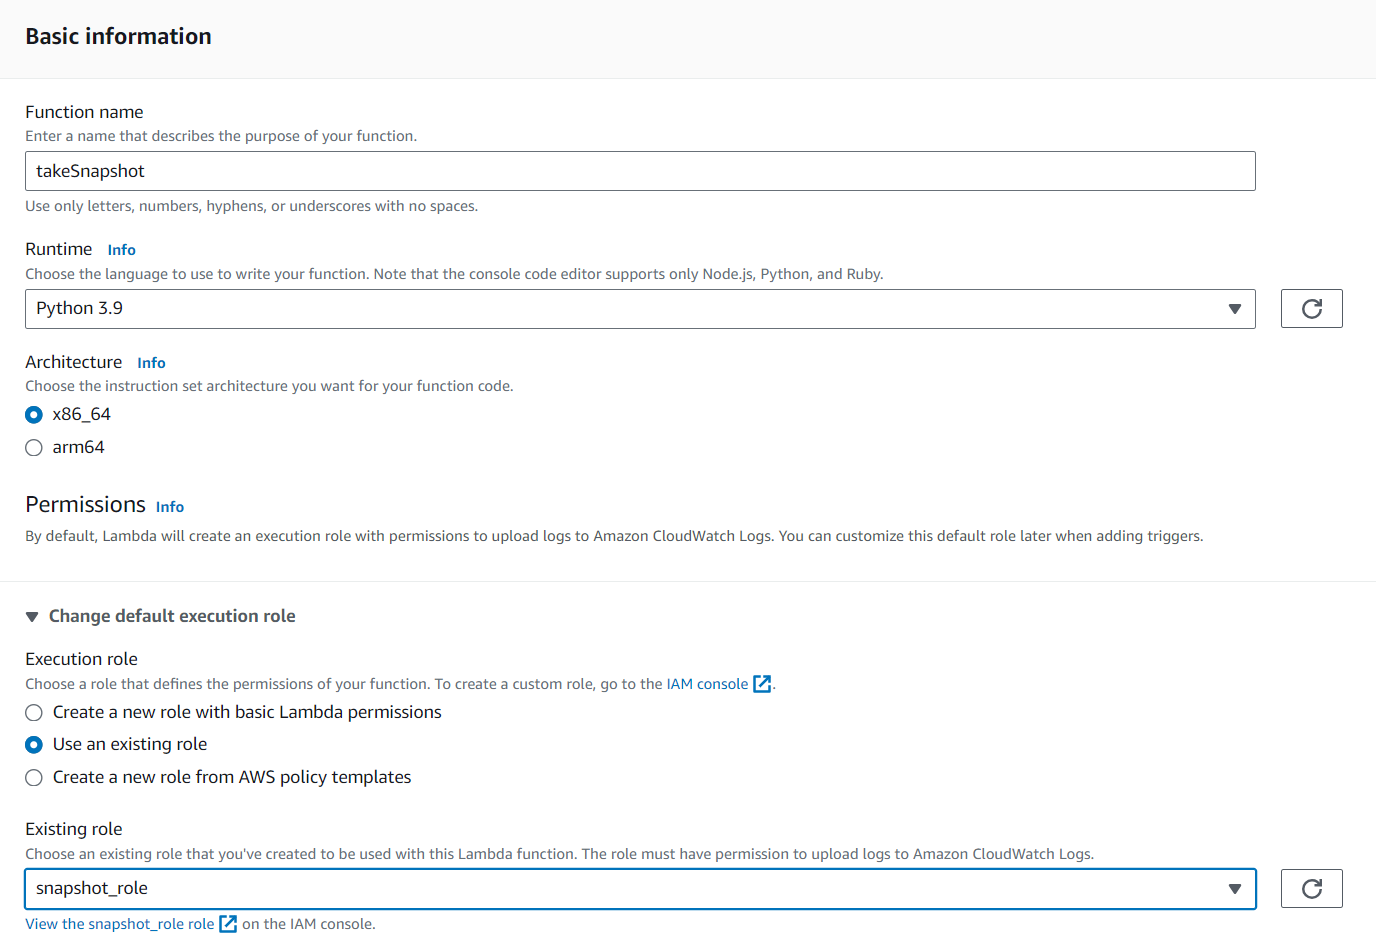
Creating a Lambda Function
Now navigate to Lambda and create a function. Name it takeSnapshot and select Python 3.9 as a Runtime. For the Execution role select Use an existing role. In the Existing role box, select the snapshot_role. Then Click on Create function.
Now we need a Python code that takes EBS Snapshot. Paste the following code into the Lambda function code block then click the Deploy button.
import json
import boto3
import time
from botocore.exceptions import ClientError
def lambda_handler(event, context):

 try:
 # EC2 Client
 client = boto3.client('ec2', region_name='us-east-1')
 # Get Volume ID of EBS attached to EC2 Instnace
 response = client.describe_volumes()
 if len(response['Volumes']) > 0:
 for k in response['Volumes']:
 print("EBS Volume ID : ",k['VolumeId'], " of EC2 Instance : ", k['Attachments'][0]['InstanceId'])
 try:
 # Create a Snapshot of Volume
 responsesnapsnot = client.create_snapshot(VolumeId= k['VolumeId'])
 print("Snapshot Created with ID : ", responsesnapsnot['SnapshotId'])
 except Exception as e:
 print("some error :", e)
 return {
 'statusCode': 200,
 'body': json.dumps("sucess")
 }
 except ClientError as e:
 print("Detailed error: ",e)
 return {
 'statusCode': 500,
 'body': json.dumps("error")
 }
 except Exception as e:
 print("Detailed error: ",e)
 return {
 'statusCode': 500,
 'body': json.dumps("error")
 }
We'll need the Lambda function ARN, So copy it for later.
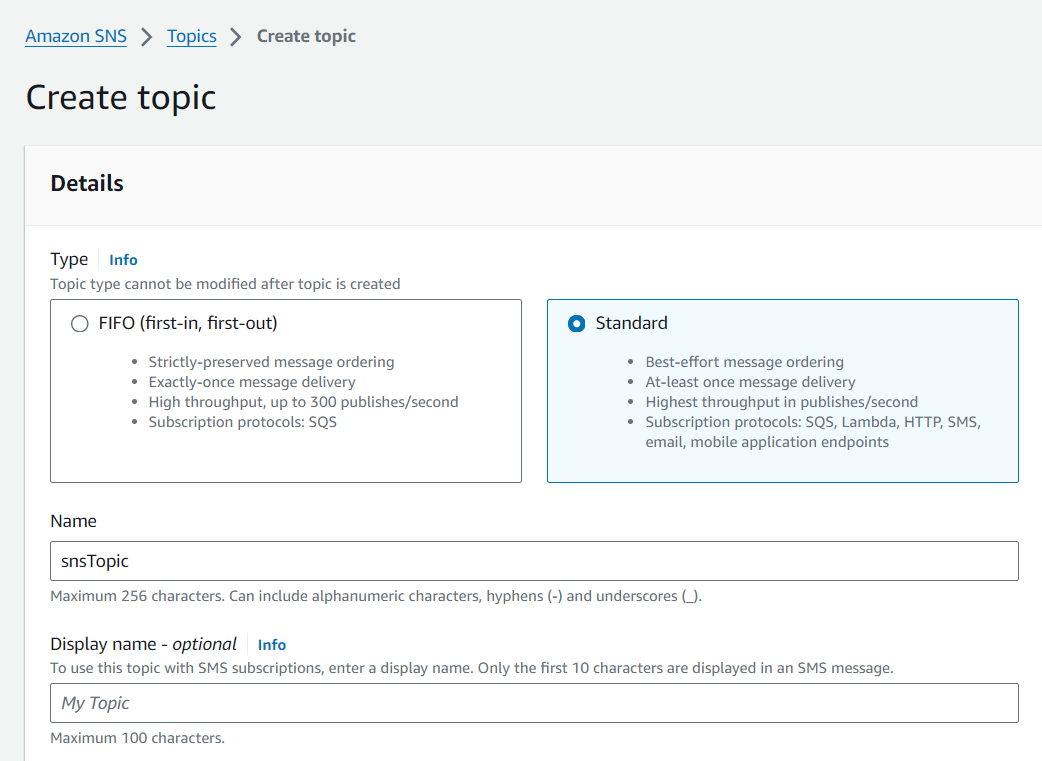
Creating SNS topic & Subscriptions
Now go to the SNS console and click on Topics, then Create Topic.
For Type select Standard and name it snsTopic.
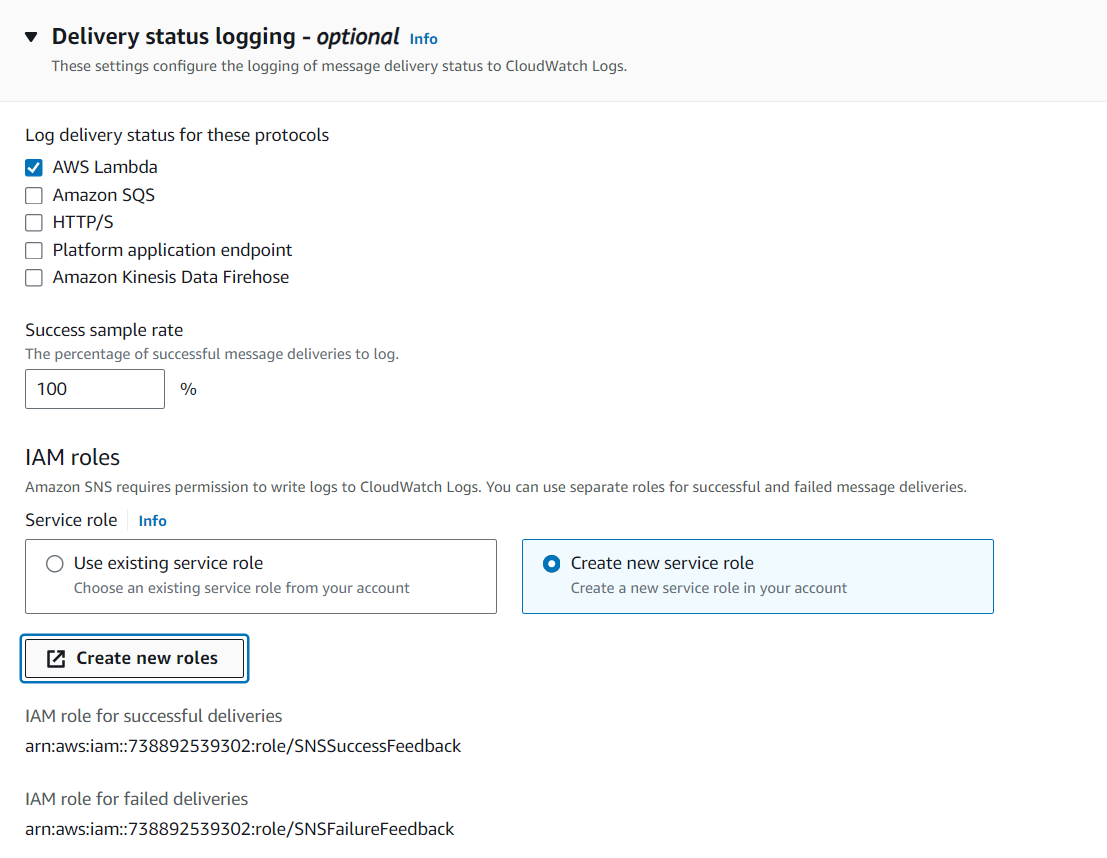
Scroll down a bit and expand the Delivery status logging section.
In there, select AWS Lambda, click Create new service role, and then click on Create new roles.
Clicking on Create new roles will redirect you to another tab for IAM. In that tab, leave everything as default and click Create role.
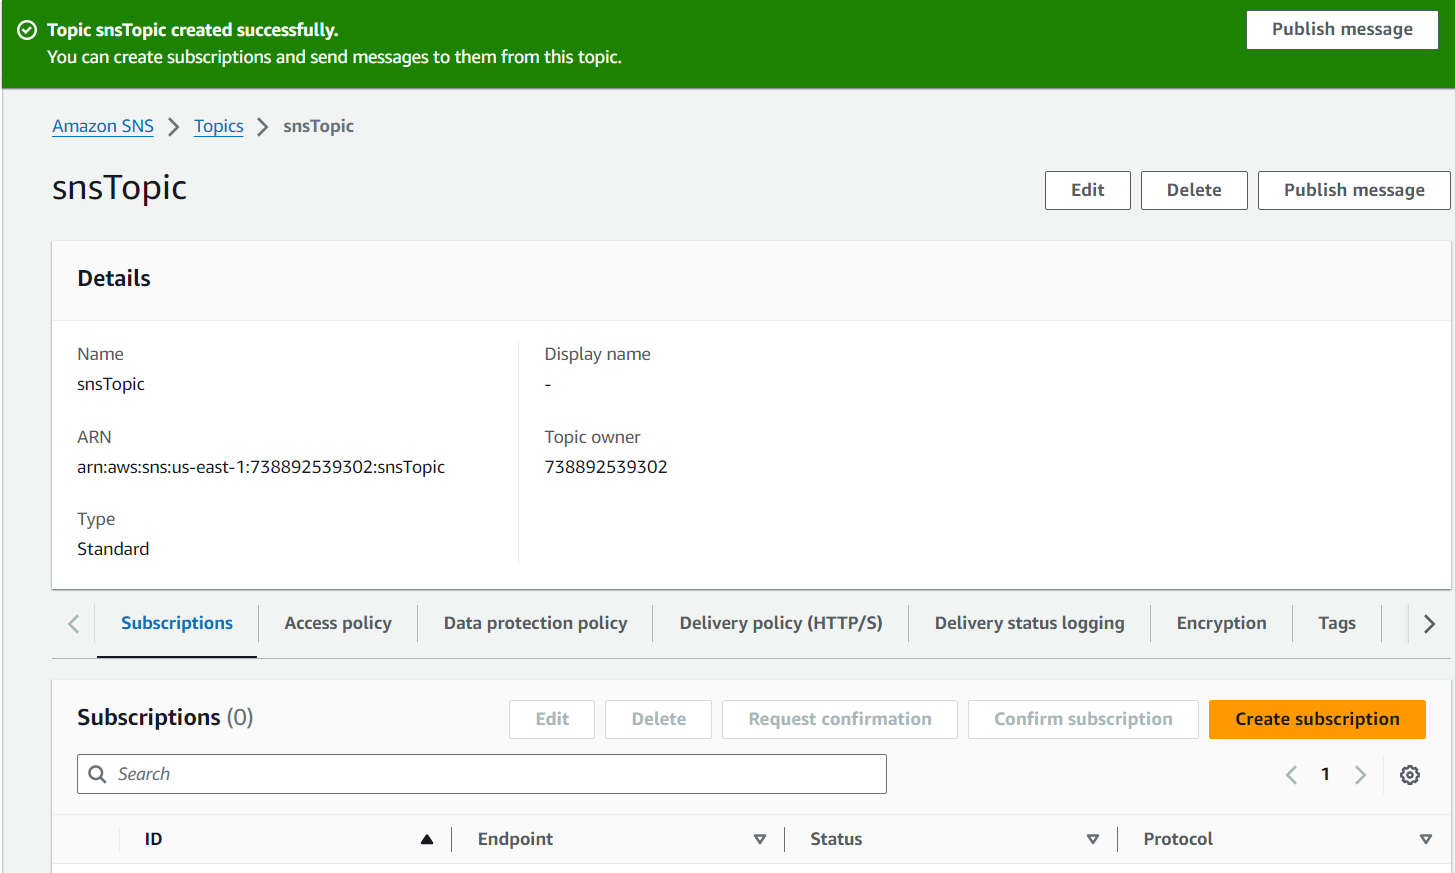
Now we're done configuring the SNS topic, so click on Create topic.
We should now see the topic being created successfully as below. We will now be creating 2 subscriptions i.e. AWS Lambda and Email.
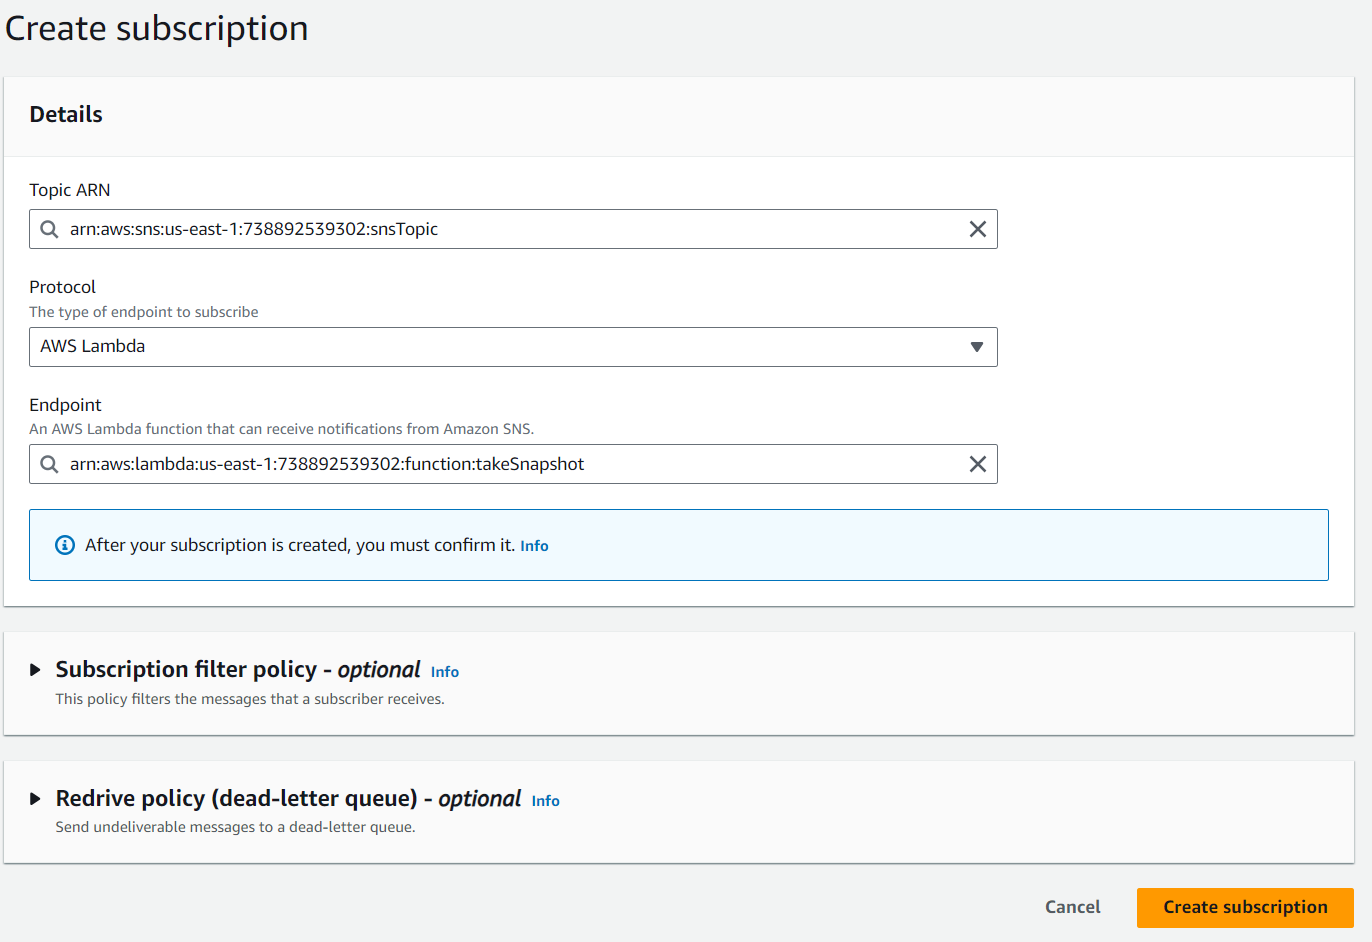
Let’s create the Lambda Subscription, Click on Create subscription. For Topic ARN choose the topic we created. For Protocol select AWS Lambda and paste the Lambda function ARN into the Endpoint box that we had copied earlier. Then click on Create subscription.
Let’s create the Email subscription now. Choose the same topic ARN.
This time for Protocol, choose email and enter your email address in the Endpoint box.
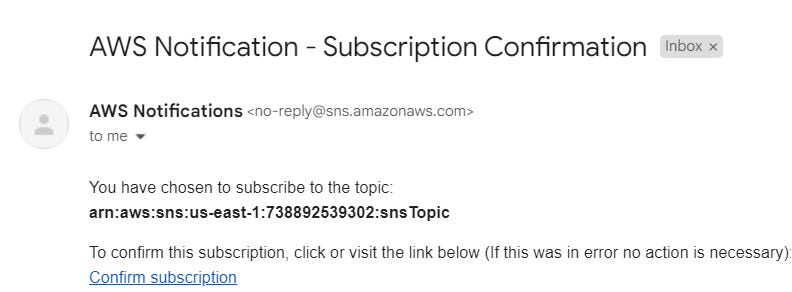
After you create the subscription, you should receive an email asking if you would like to subscribe. You need to Click on Confirm subscription to confirm the subscription and receive the snapshot creation status in your mail box.
Creating EventBridge Rule
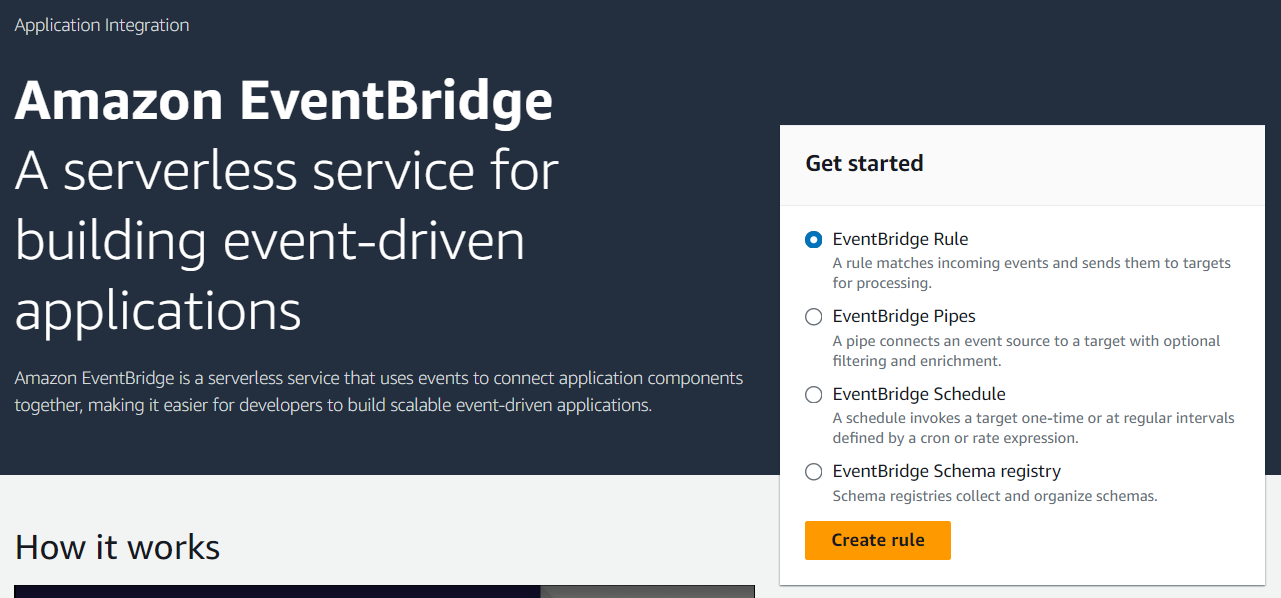
Lastly, we're creating a rule within Amazon EventBridge. On the EventBridge screen, select EventBridge Rule then click Create rule.
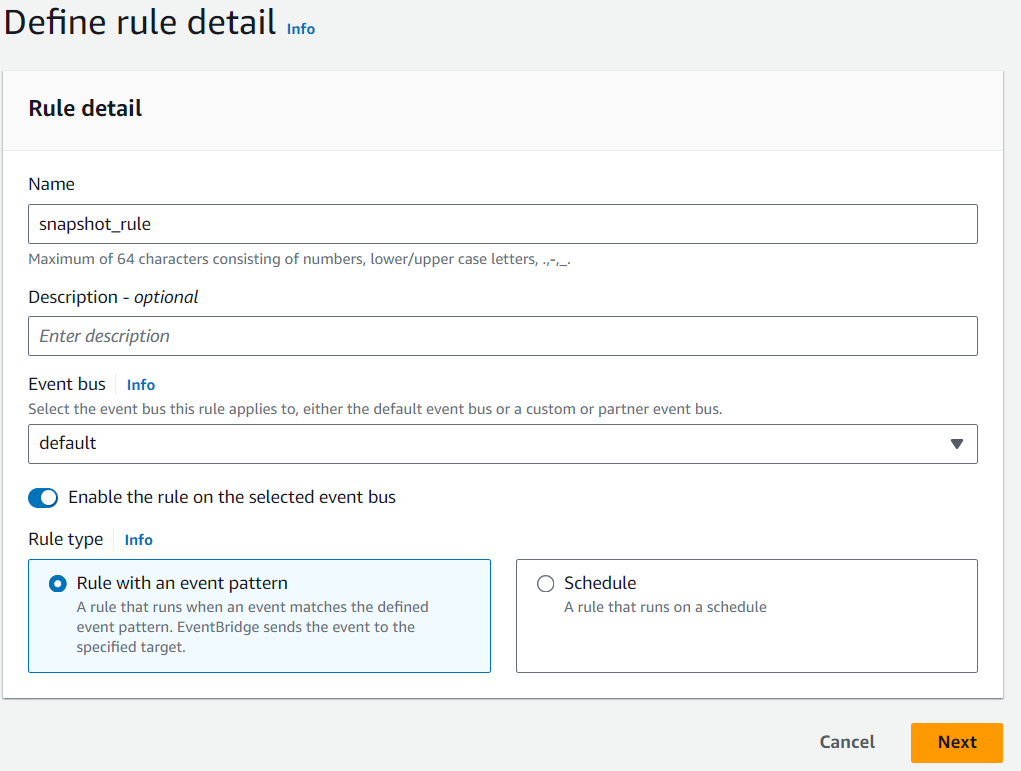
On the next screen name the rule snapshot_rule, select Rule with an event pattern then click Next.
Next, choose AWS events or EventBridge partner events. Then scroll down to Event pattern.
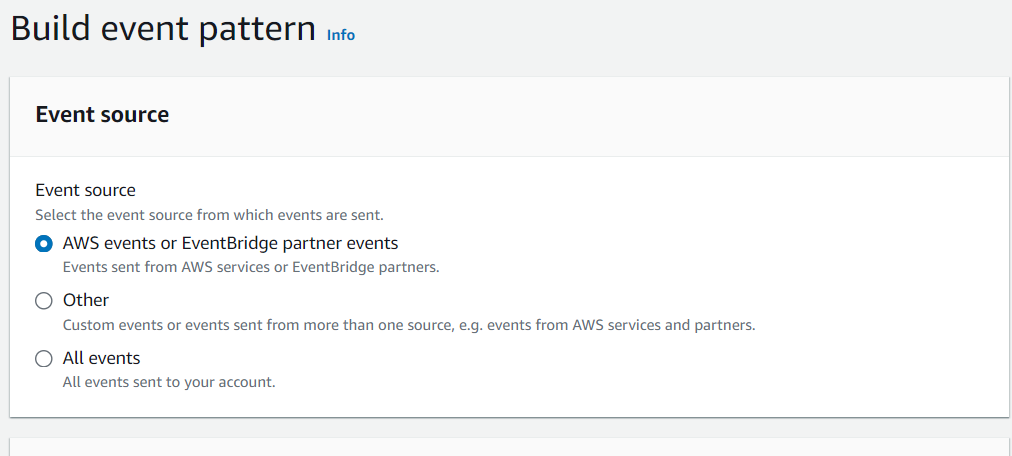
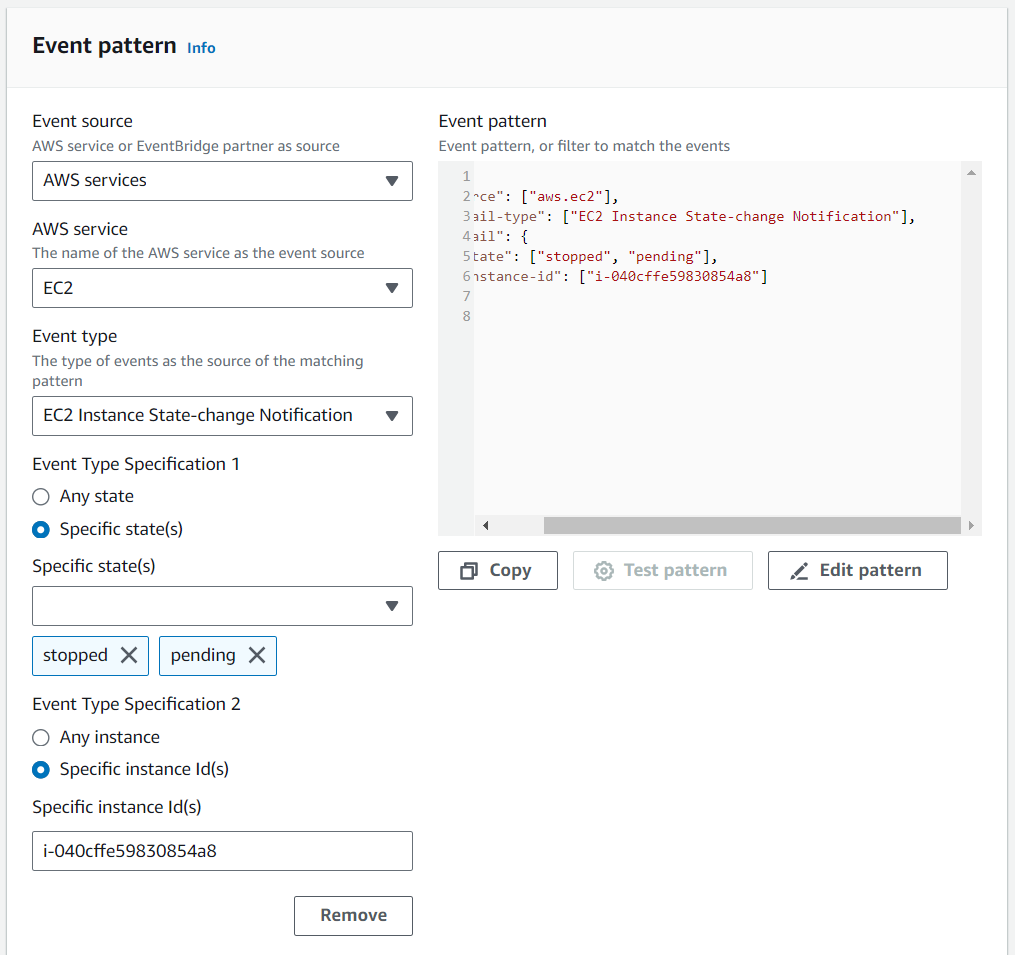
Now in the Event pattern section,
Event source: select AWS services,
AWS services: EC2,
Event type: EC2 Instance State-change Notification.
In Event Type Specification 1, click on Specific state(s) and select stopped and pending.
In Event Type Specification 2, Select Specific instance Id(s), paste in the instance ID that you have copied earlier then click Next.
In the next screen, select SNS Topic for the target, and then on the Topic field choose the topic we created. Keep clicking next and Create the rule.

And after you're done creating the rule, You should see the screen as below with snapshot_rule Status Enabled.

Testing the setup
Finally, We can test our Lambda function and EventBridge rule by going over to the EC2 console and stopping the instance.
If you have followed the instructions correctly, 2 things should happen. The first is that you should receive an email stating that the EC2 has been stopped as below.

Secondly, a snapshot of the instance should be in progress or completed.

If you got the Mail and Snapshot created then congratulations You got this.
Don't forget to clean up all resources after you're done.
Thanks for reading till the end. See you on the Next Blog.