
AWS, Automate Image Resizing and Transfer System
Full hands-on guide for Automated Image Resizing system


We all know AWS Lambda has some advanced features when it comes to computation.
In today's modern world, serverless services are really handy if we want to do quick processing.
In this article, we are going to build a simple hands-on project with AWS Lambda.
We will use Lambda to reduce our file size and also integrate other AWS services like AWS S3 for storing our images and AWS SNS for notifications.
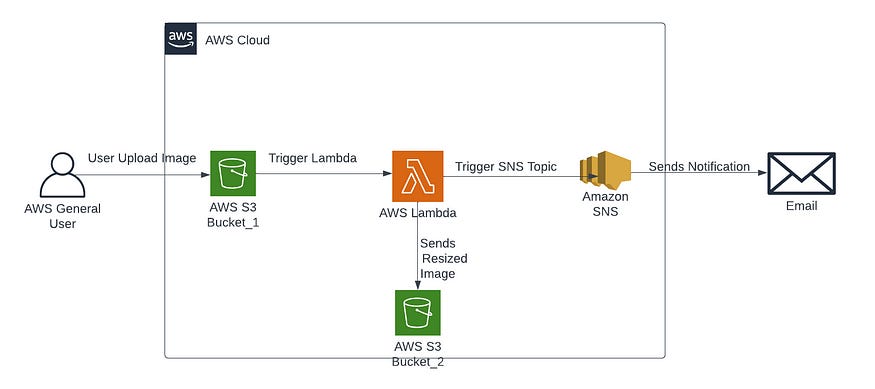
Workflow Description:
This project focuses on building an automated system for image processing and management within the AWS ecosystem.
The goal is to streamline the handling of images by automatically resizing them and transferring them to a designated storage location while keeping stakeholders informed through notifications.
Key AWS services, such as Lambda, S3, and SNS, are used to orchestrate this workflow.
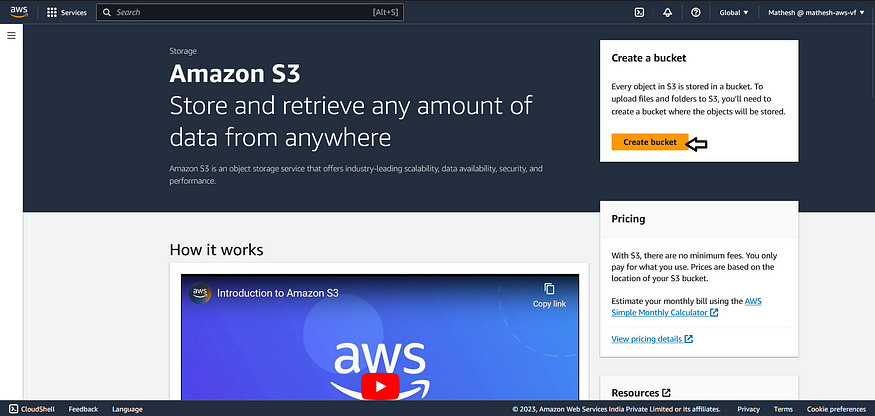
Step 1 :
Creating Source and Designation s3 Buckets :
Navigate to the S3 Console and follow the Outlined Steps below.


Now, Create the destination bucket using the same steps and name it with a unique name.
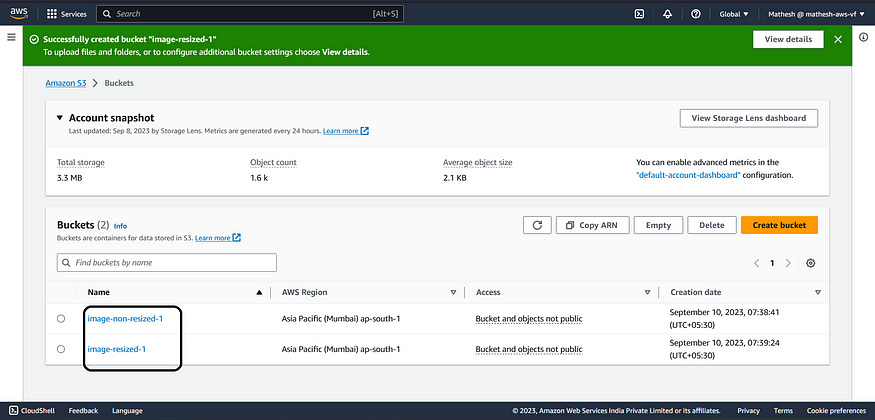
As you can see above, I have created two buckets one is the Source bucket and another one is the Destination bucket.
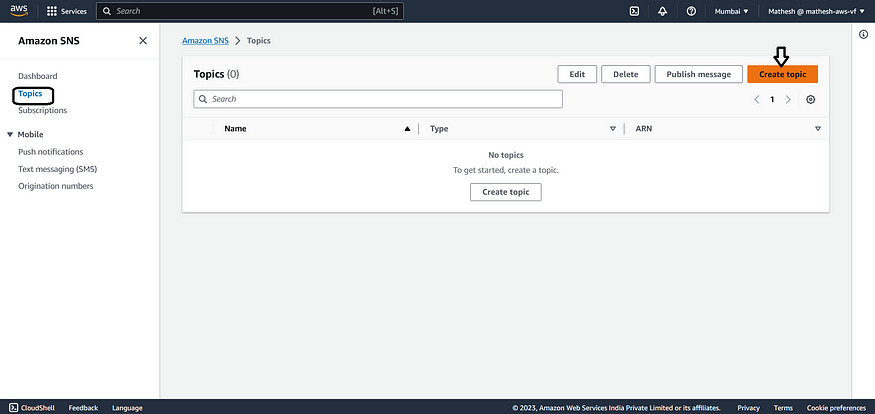
Step 2 :
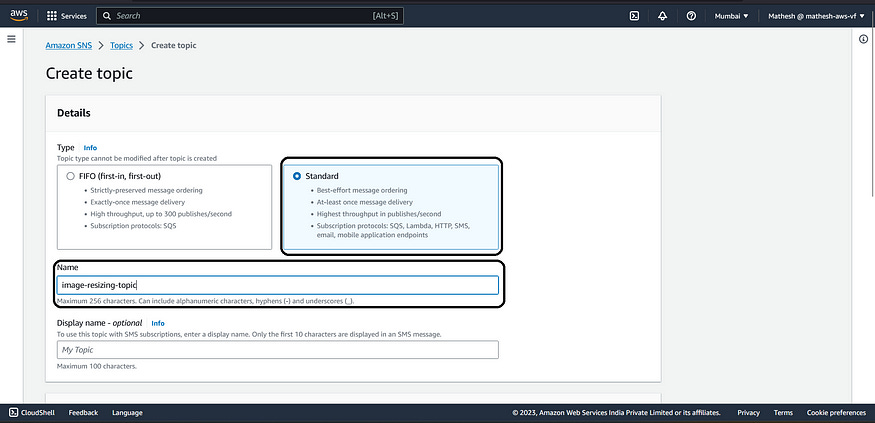
Creating the SNS Notification :
Navigate to the SNS console and follow the Outlined Steps below.
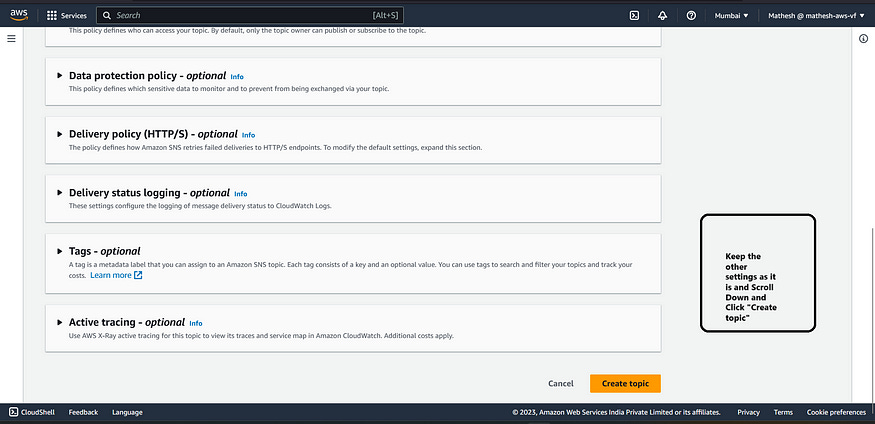
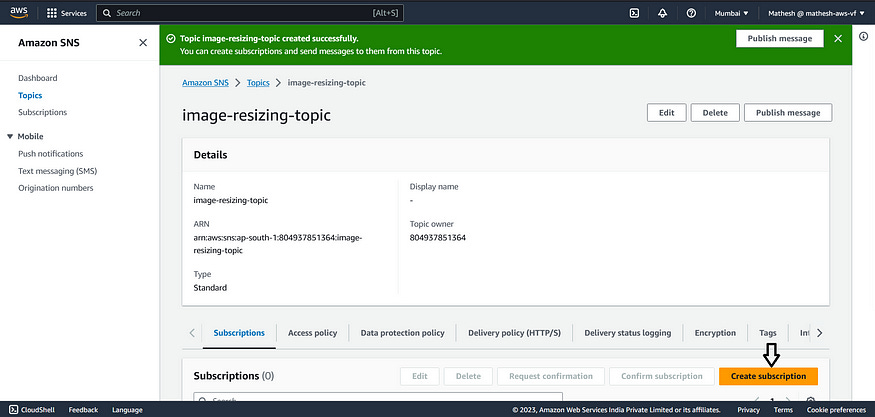
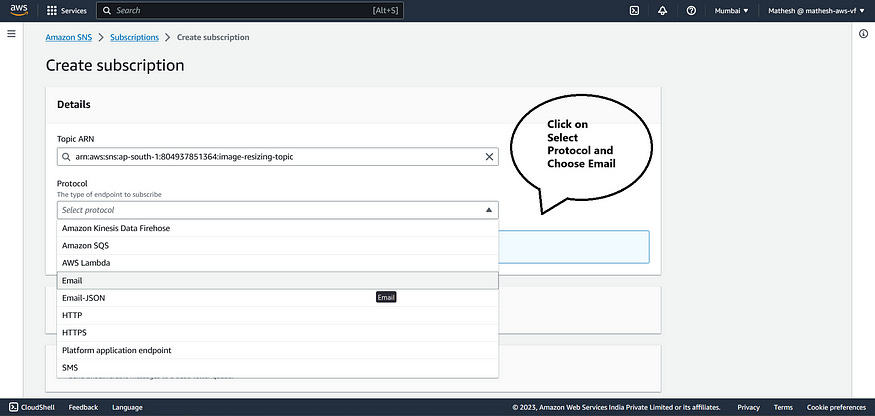
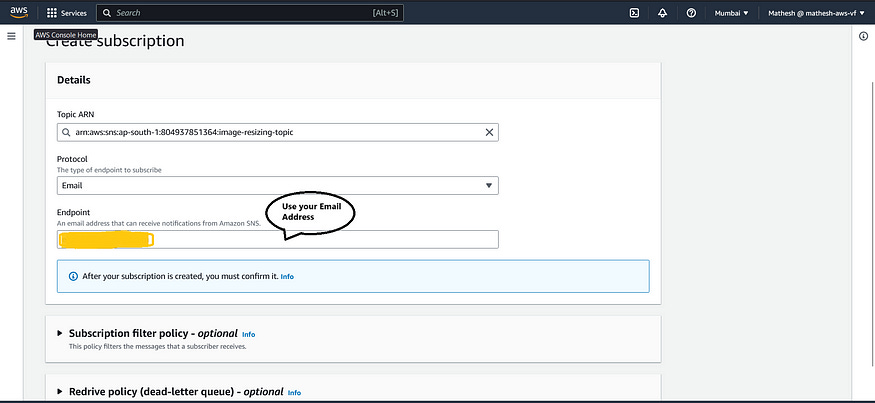
Then, Scroll down and Click “Create Subscription”.
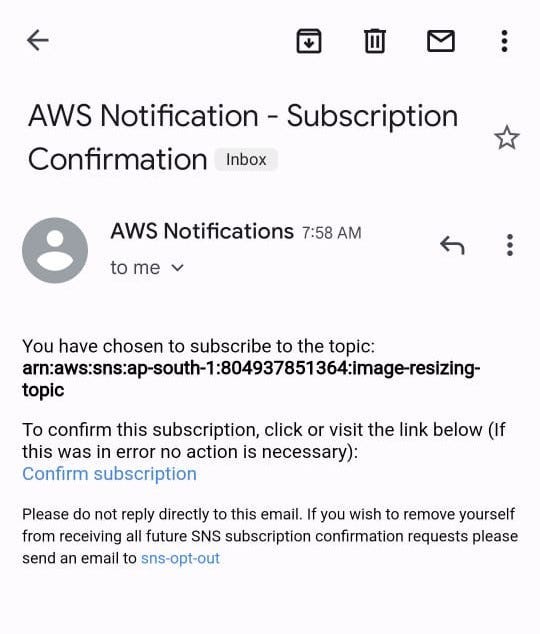
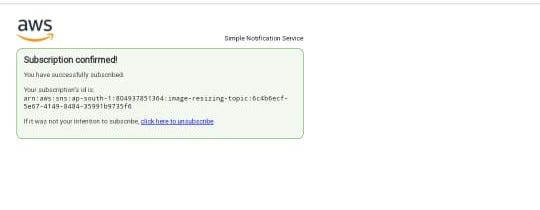
After this, you will receive some mail for Subscription Confirmation and you have to confirm that.
You can use any other protocols also like SQS, HTTP, SMS, etc.
Step 3 :
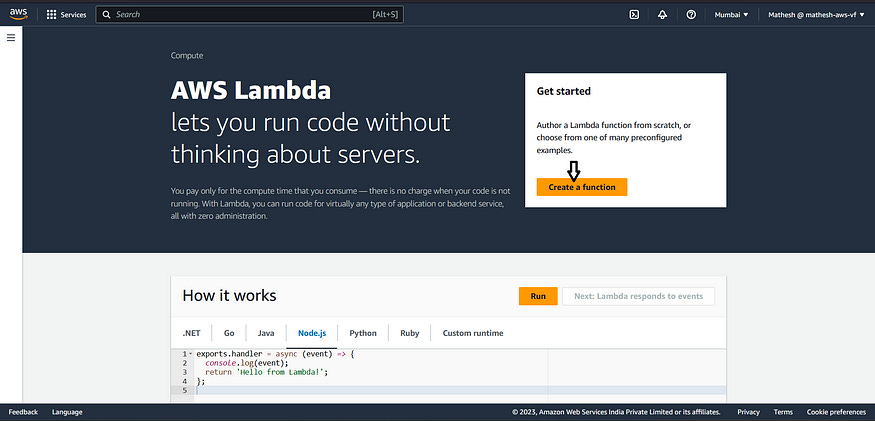
Creating the Lambda :
Navigate to the Lambda Console and follow the Outlined steps below.
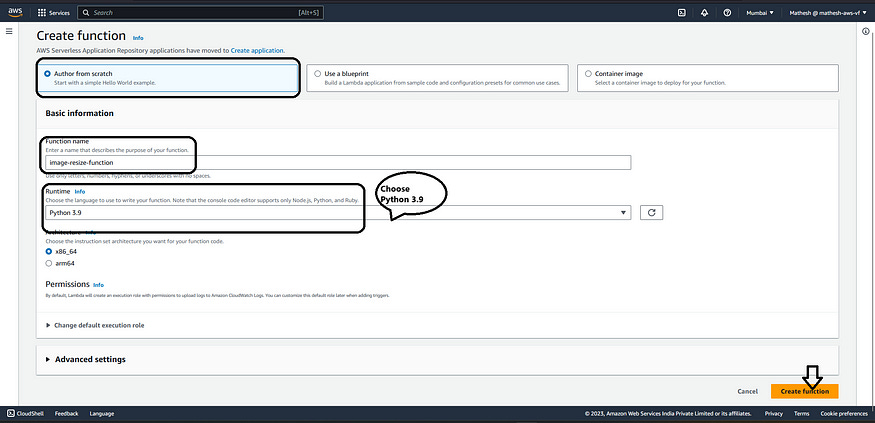
Now replace the default code with the image-resizing-s3.py and deploy the changes.
#image-resizing-s3.py
import os
import boto3
from PIL import Image
from io import BytesIO
# Initialize AWS clients
s3 = boto3.client('s3')
sns = boto3.client('sns')
# Define the S3 buckets and SNS topic
bucket_1 = 'image-non-sized-1' # your-source-bucket
bucket_2 = 'image-sized-1' # your-destination-bucket
sns_topic_arn = 'arn:aws:sns:ap-south-1:804937851364:image-resizing-topic' # your-sns-topic
def lambda_handler(event, context):
if 'Records' in event:
# Handle S3 batch event
for record in event['Records']:
handle_s3_record(record)
else:
# Handle single S3 event
handle_s3_record(event)
def handle_s3_record(record):
# Ensure the event record structure is correct
if 's3' in record and 'bucket' in record['s3'] and 'name' in record['s3']['bucket'] and 'object' in record['s3'] and 'key' in record['s3']['object']:
# Get the bucket name and object key from the S3 event record
source_bucket = record['s3']['bucket']['name']
object_key = record['s3']['object']['key']
# Download the file from S3 bucket_1
response = s3.get_object(Bucket=source_bucket, Key=object_key)
content_type = response['ContentType']
image_data = response['Body'].read()
# Resize and compress the image
resized_image = resize_and_compress_image(image_data)
# Upload the resized and compressed image to S3 bucket_2
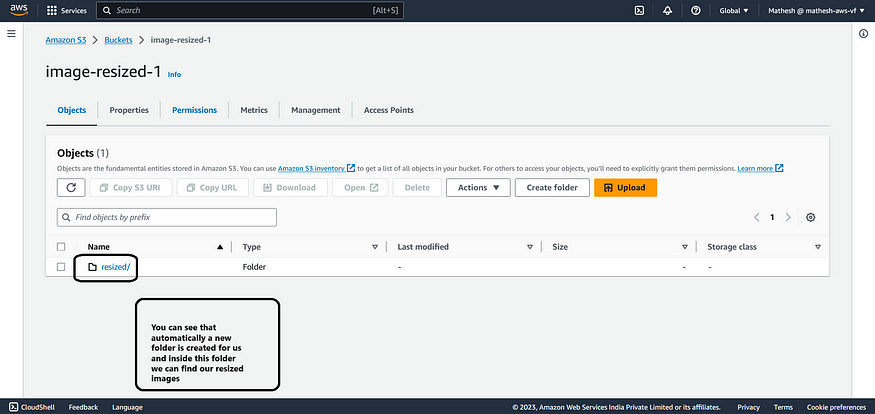
destination_key = f"resized/{object_key}"
s3.put_object(Bucket=bucket_2, Key=destination_key, Body=resized_image, ContentType=content_type)
# Send a notification to the SNS topic
message = f"Image {object_key} has been resized and uploaded to {bucket_2}"
sns.publish(TopicArn=sns_topic_arn, Message=message)
else:
# Log an error message if the event record structure is unexpected
print("Error: Invalid S3 event record structure")
def resize_and_compress_image(image_data, quality=75):
# Open the image using PIL
image = Image.open(BytesIO(image_data))
# Compress the image
image_io = BytesIO()
image.save(image_io, format=image.format, quality=quality)
return image_io.getvalue()( Don’t test the code now we have to do some more actions before testing. )
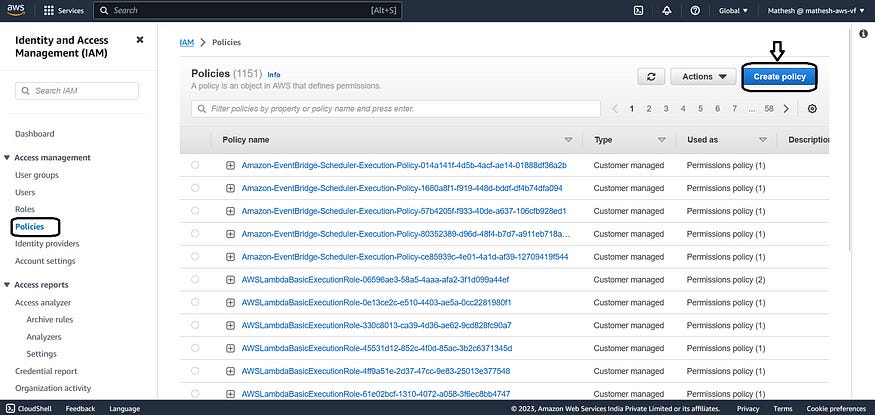
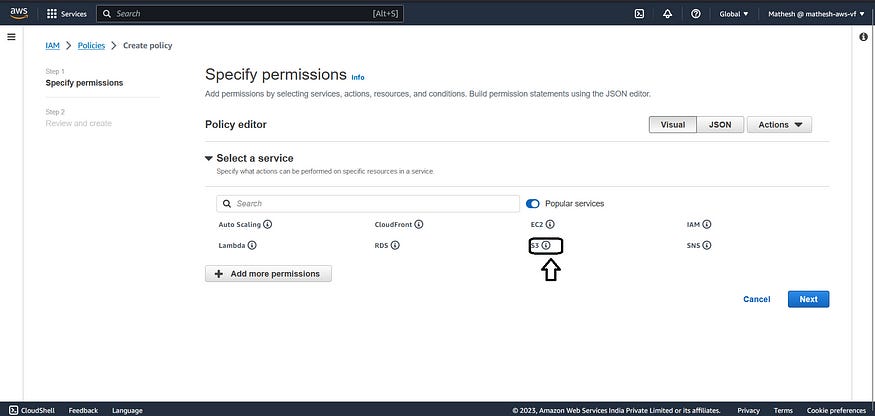
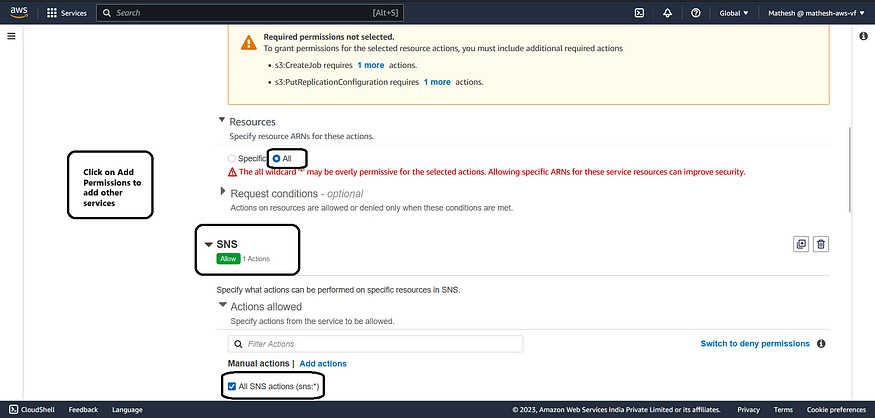
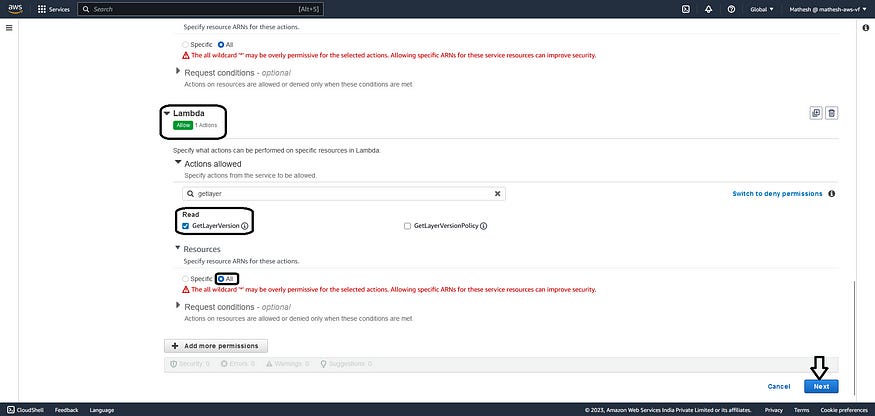
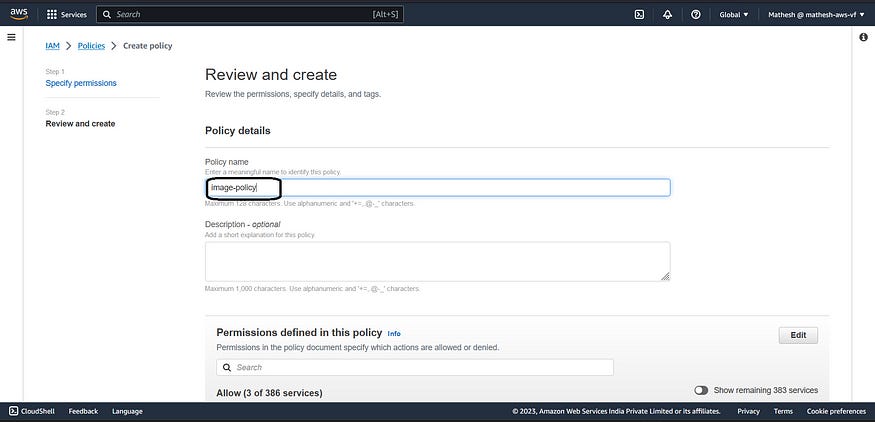
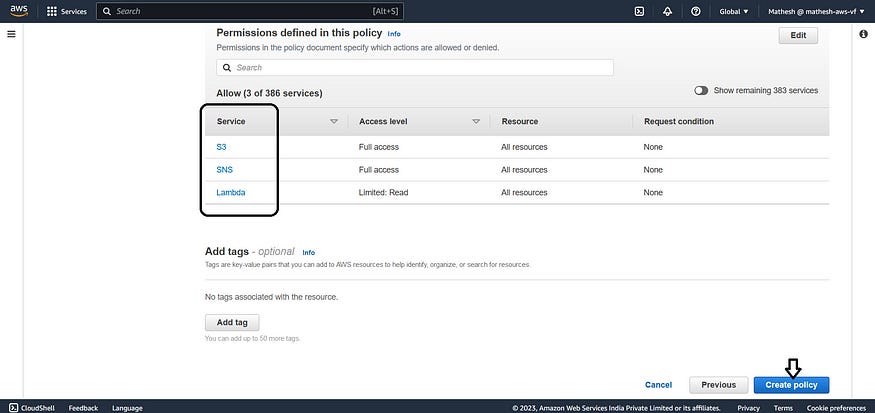
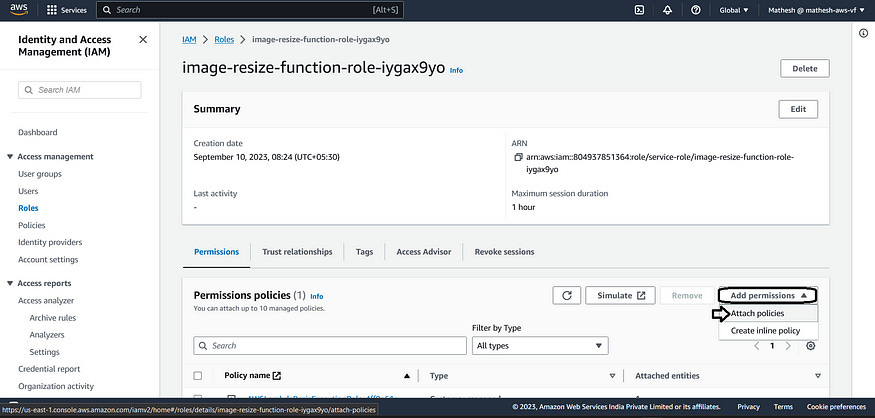
After that, We have to give some permission for our Lambda Function to do our process (resizing).
For that navigate to the IAM Console and follow the below steps.

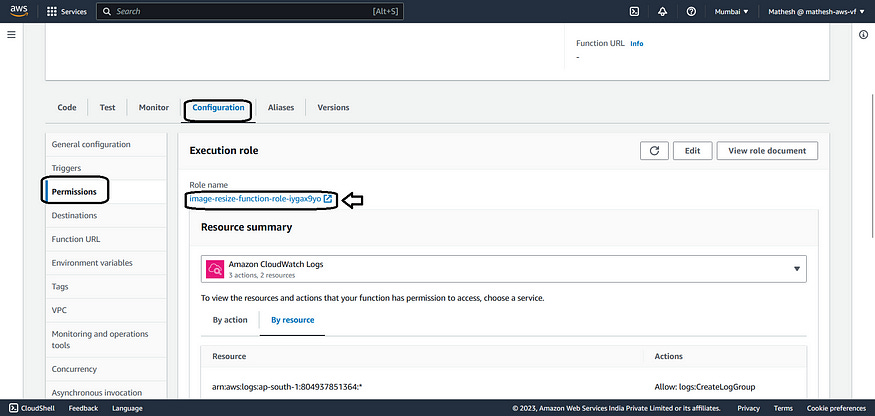
Now, navigate to the Lambda Console and follow the steps below.

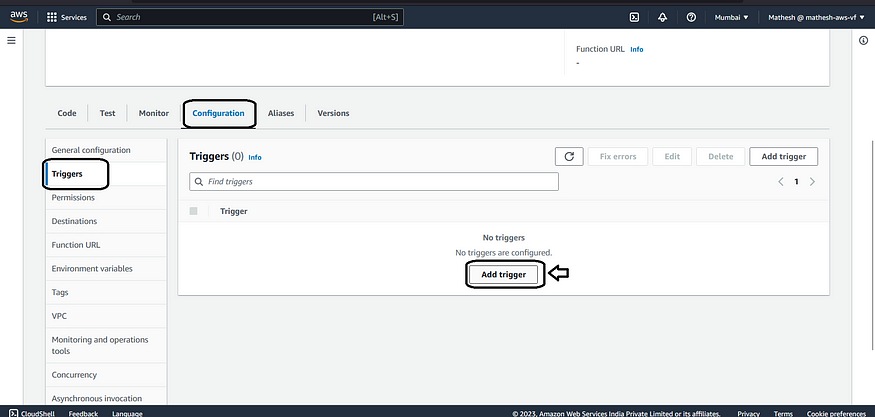
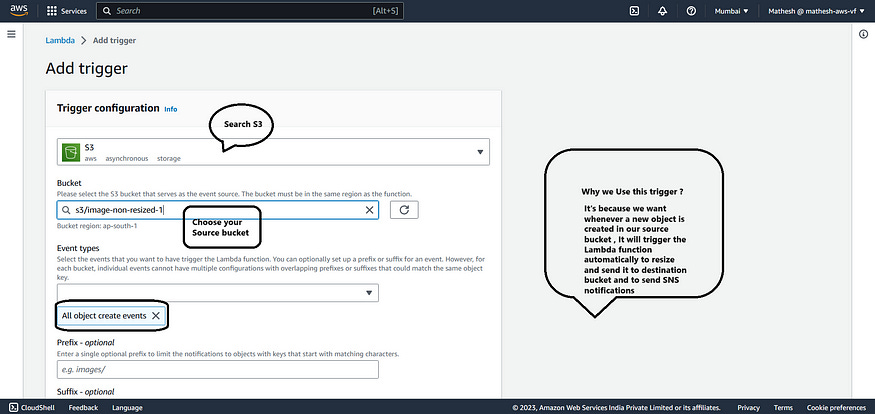
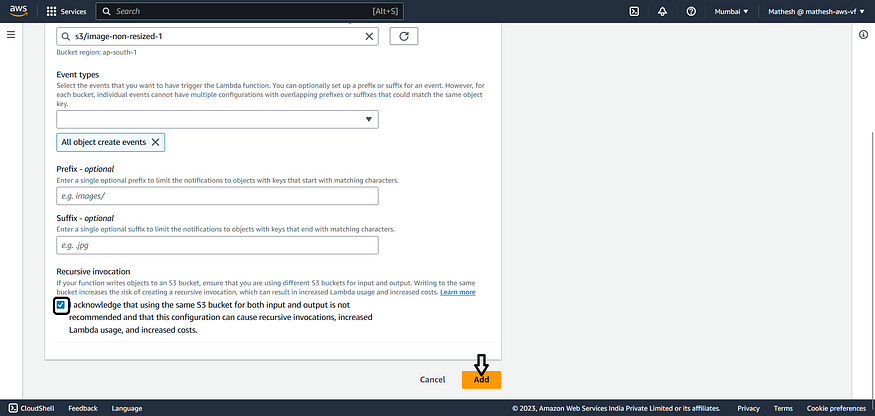
Now we have to trigger the function.
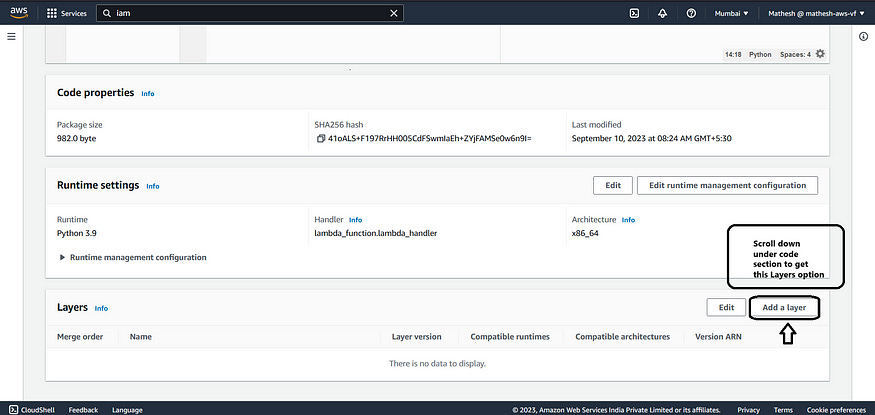
Now, Go to the code section and scroll down to layers. We have to add layer.
You might be thinking, why?
It’s because to resize the image we upload in our source S3 bucket, We need a Python library called pillow in our code to resize the image. We can manually add a Pillow library also, But it’s very time-consuming and you have to do a lot more, Instead of manually adding pillow library we are going to use layers for Some easy action.
Follow the outlined Steps below.
Copy this ARN, And paste it as shown in the image below.
arn:aws:lambda:ap-south-1:770693421928:layer:Klayers-p39-pillow:1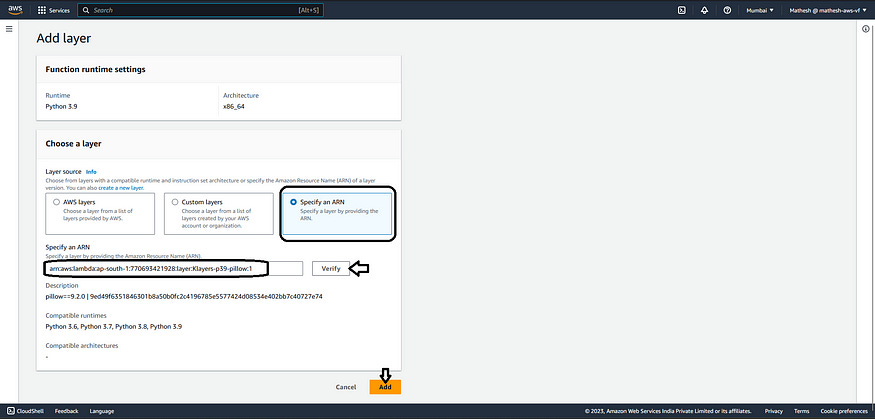
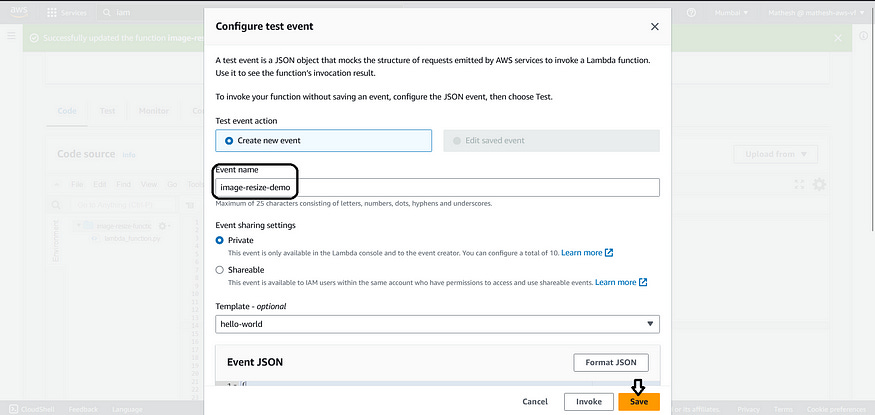
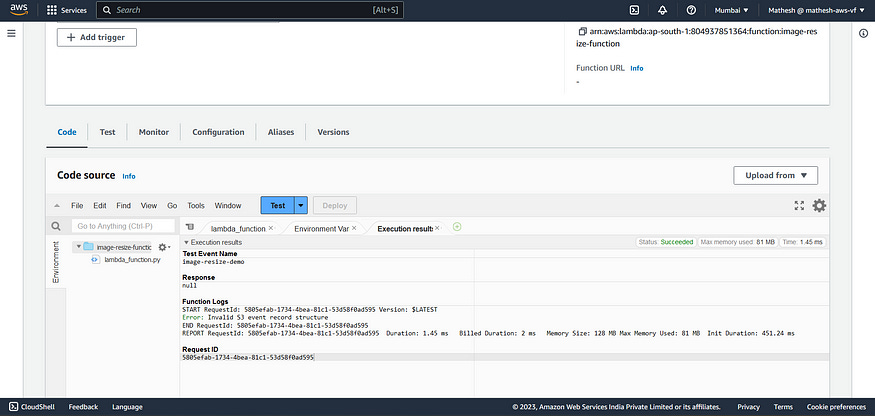
After doing all the actions above, now we can finally test our code.
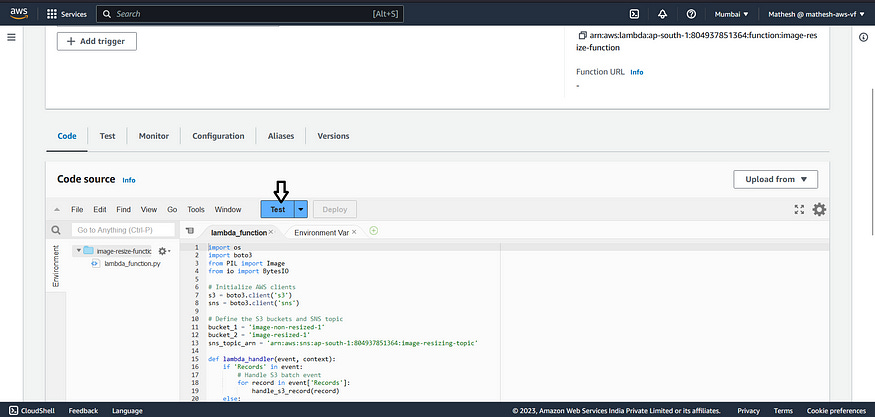
It will show some results like the one below, It runs successfully but returns some errors because we have not uploaded the images in S3 yet.
Step 4 :
Results :
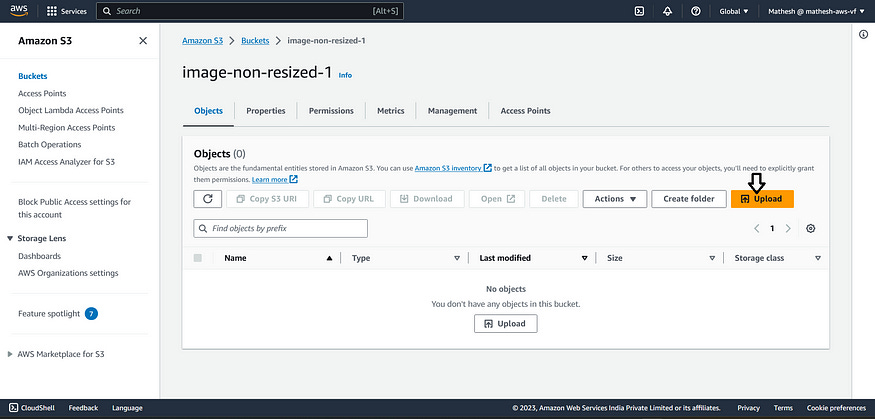
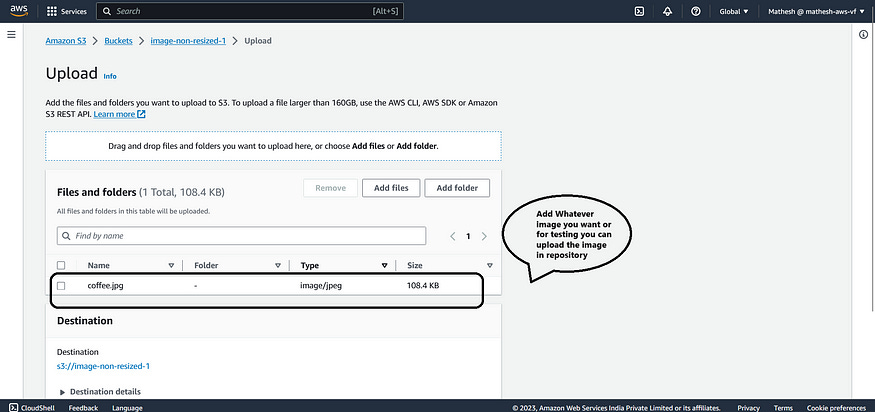
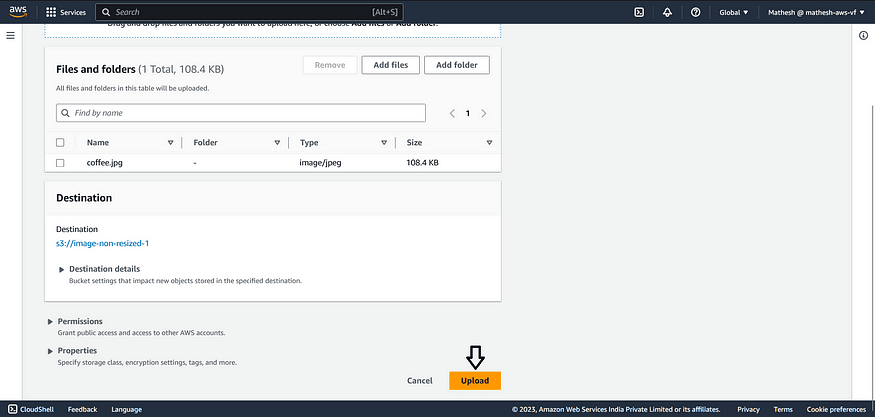
Navigate to the S3 Console and Upload Some images in Source Bucket.
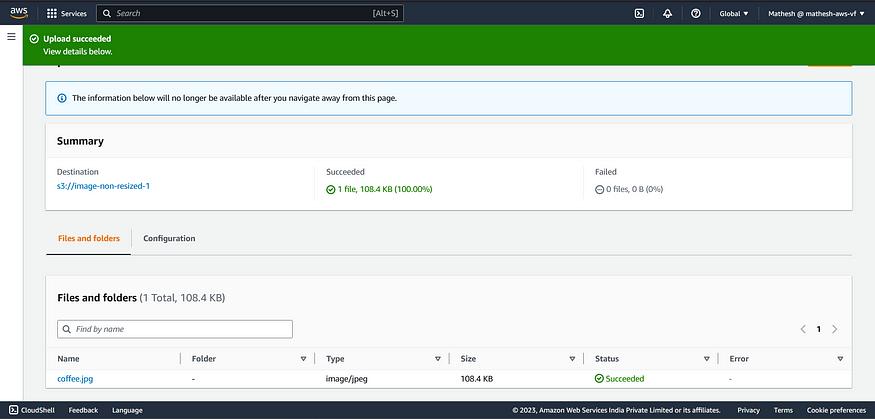

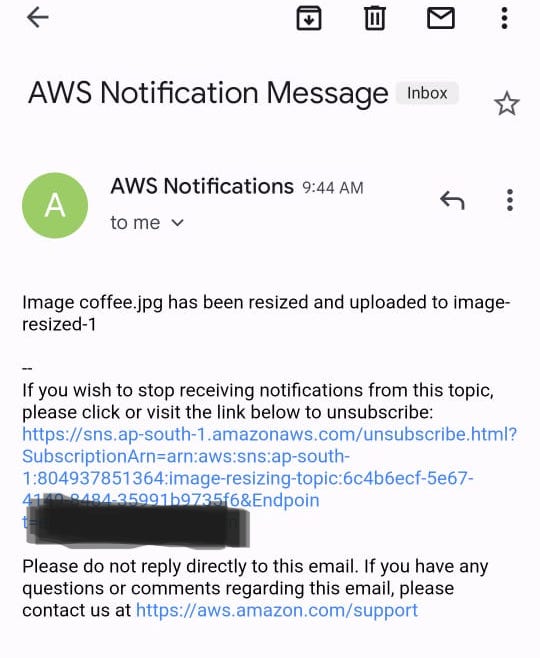
It Successfully resized the Image and sent me the Notification.
If you received the same notification, Then Congratulations You have done it!
For any query, you can Connect with Us on LinkedIn: Rajan Kafle and Mathesh M